
"Great buildings, like great mountains, are the work of centuries." Victor Hugo
At the very least, parts of this hobby can sometimes seem to take centuries. I've had a few terrain update projects on my grand list of things to do for some time now. After my figure-painting blitz in the last part of 2018 to get Xmas gifts completed (link), I thought I'd switch gears and look after some of these long-standing terrain items that needed updates or makeovers.
First up, I've been wanting to re-base our grand resin church (from HG Walls, I think?) This fantastic, multi-period building had a rather large base with small courtyard and attendant graveyard. You can see it below in action. We were quite happy with the look of it and many a skirmish swirled among its walls over the years. But the big drawback was the size of the base when trying to fit it into and among other terrain pieces and it awkwardness for storage.
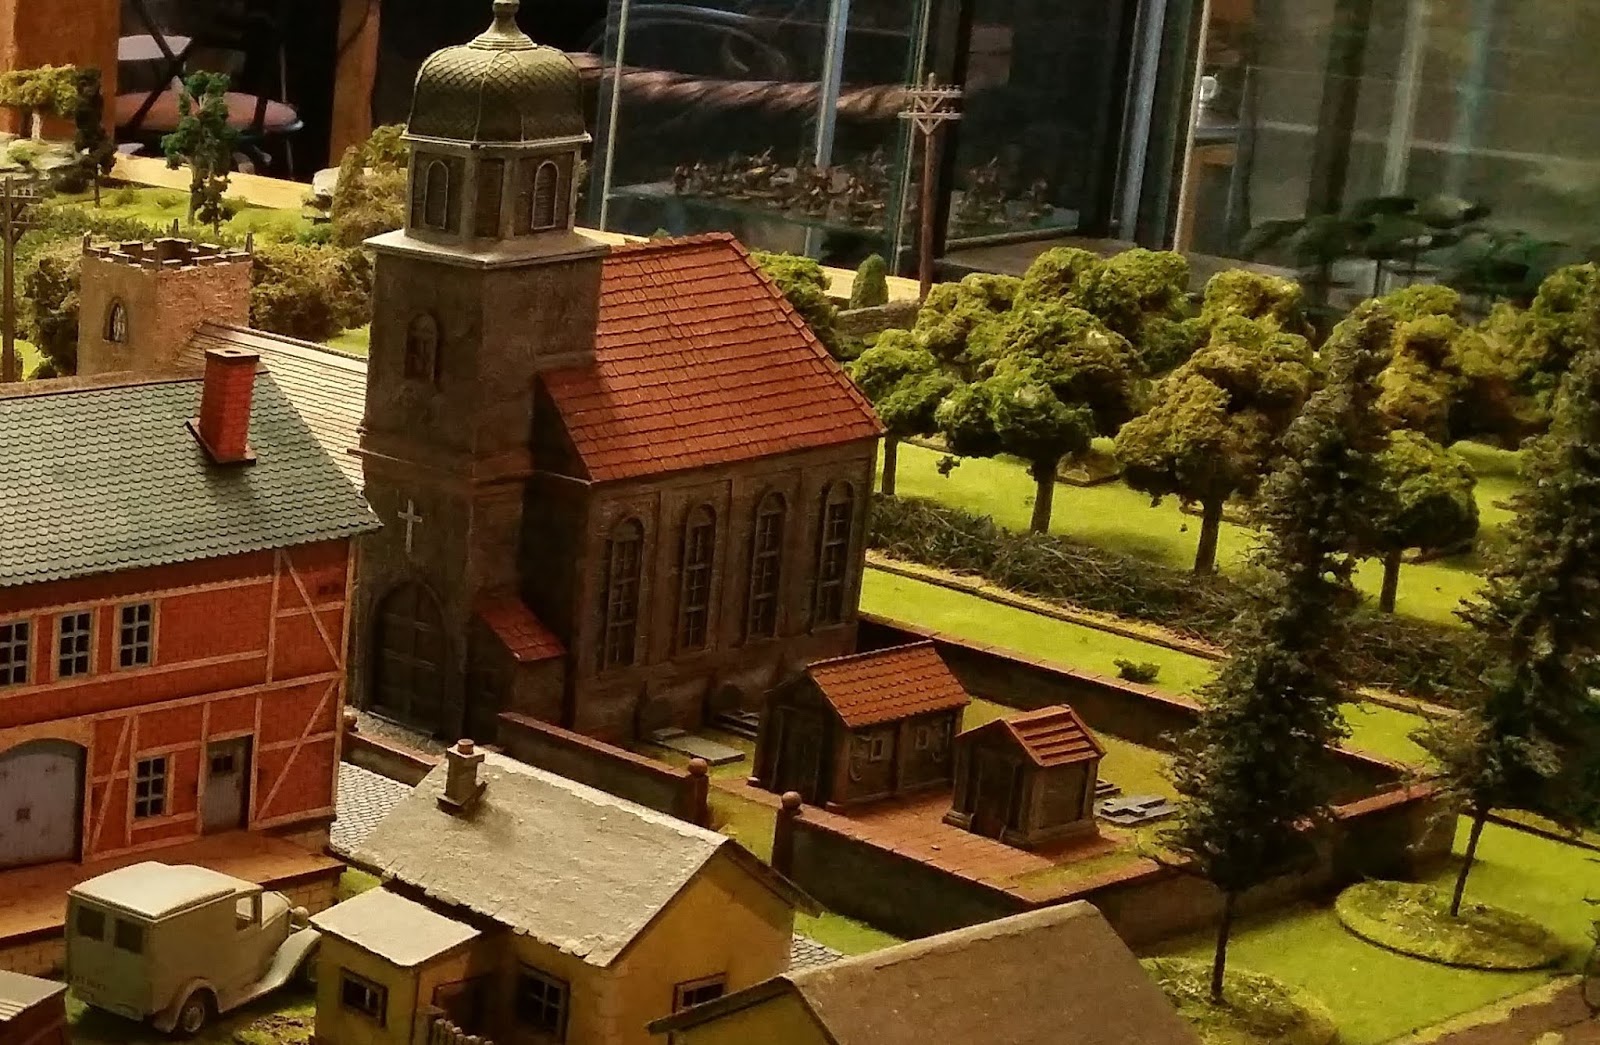
Thus I decided to rip the church off its large base and salvage as much of the graveyard as possible for a separate terrain piece.

A smaller and tighter base for the church makes it more adaptable to various terrain situations and its reduced footprint easier to store. The gravestones and mausolea also received their own small bases, again for added flexibility.


I also pulled out an old half-finished courtyard piece, originally slated for the long-forgotten Boxer Rebellion project, and tarted it up. It's essentially an empty walled courtyard but allows a variety of pieces to be placed within, including the church. The courtyard walls are 1/4" plywood screwed and glued onto the base from underneath to prevent warpage of such a large base. I usually use yellow carpenter's glue for all terrain construction. It's stronger than normal PVA and dries much more quickly. In this case, I decided to up the ante in the fight against warpage and drill-inset-screw the walls. So far, no warpage! The walls were plastered with tile grout and painted/dry-brushed. The last additions were a few WWII era posters (that can be selectively ignored if the piece is used for earlier periods).


Also pulled from the unfinished terrain pile were two kits from Sarissa...village fountain and park benches. Added to the new courtyard, they provide another option. I'm thinking of purchasing some large willow trees for this as well. The fountain came in a nice little kit that took only about 30 minutes to construct. I realized early that "as-is" it would look to be a wooden structure because of the various layers of mdf required to build it up. I chose to use a liberal coating of wood filler to... ummm... fill... The result, I think, looks more like stone. I added a small flagstone enclosure made from some old offcuts of plastic stonework.

Also included in the terrain blitz was a Charlie Foxtrot townhouse piece that had been sitting on Michael's shelves in the Trenton Gaming Emporium, built and base-coated, but sadly neglected for many months. As with almost all mdf building kits, the roof was flat (although etched) and showed the attachment plugs too clearly. I chose to overcoat the roof with some laser-cut shingles from Warbases (a tedious but curiously cathartic exercise) to provide a bit more depth. The walls were coated with tile grout and painted/dry-brushed as normal.

Michael had already provided a nice little birch tree for the backyard, attached via rare earth magnet. Some posters were also added to provide variety.


First use of the new townhouses in a recent game.

Many a gamer of a certain age will recognize this piece... the ubiquitous Hovels resin church. Pulled from the depths of my terrain black hole, this lovely little piece is intended for the ImagiNation collection (but could easily be used for later periods, including WWII, if required). An easy build (glue the steeple on and cut a base from 3mm mdf) and straightforward paint job made this a pleasure to work on.


And a peak at what's coming up next...


No comments:
Post a Comment