Showing posts with label 28mm Napoleonics. Show all posts

Monday, February 8, 2021

Napoleonic odds & ends

I've been puttering away the last couple of weeks on some various Napoleonic odds & ends as I wait for a new order to replenish/increase the lead pile. You can see pics below but in the meanwhile...

I finally pulled the trigger on a new project and ordered some Late Saxons from Crusader Miniatures. If planned correctly, this will be only one third of a 1066ish collection, also to include Normans and Vikings. But let's see how the Saxons get on first...

My prevarications over the last couple of months about whether to start a new project in 2021 was summed up rather nicely, if vaguely inappropriately, by a conversation with Michael...

me: "I pulled the trigger on a Crusader Miniatures Saxon force"

Michael: "thought you weren't ready to commit?"

me: "yeah, I know, it's only 54 figures"

Michael: "that's like saying it's only one date but you like the girl, it's gonna go places"

me: "depends on how good she is"

Michael: "you have been admiring her from afar for a while so..."

And enough of that. On to the new Napoleonic tidbits...

Pierre Ducos, from the Sharpe series.
(Brigade Games)
I realize clearly from this photo how the contrast painting method looks up close with crap photography. The technique really does look much better in "the real."

British Engineering or Exploring officer... cuz, why not?
(Brigade Games)


 While checking my tracking spreadsheets, I was surprised to see I had not completed any Deployment Point vignettes for my Sharp Practice US War of 1812 force (despite the fact I had already completed 300+ figures for the army). Rummaging about in the spares box, I found some Old Glory US Rifles figures that seem to work well.


I also found a few leftover Old Glory US regulars infantry figures and topped them off with  a Flags of Wars flag.


I found quite a few of these Old Glory figures in the stash as well. I have used these in the past for generic militia rifles, intended to represent New York or Pennsylvania units. This time I decided to paint them as intended by the Old Glory packing label... Kentucky Rifles (in their distinctive black hunting shirts with red trim). This is the second (or third?) iteration of Kentucky militia in my wargaming life (and using the same OG figures!).

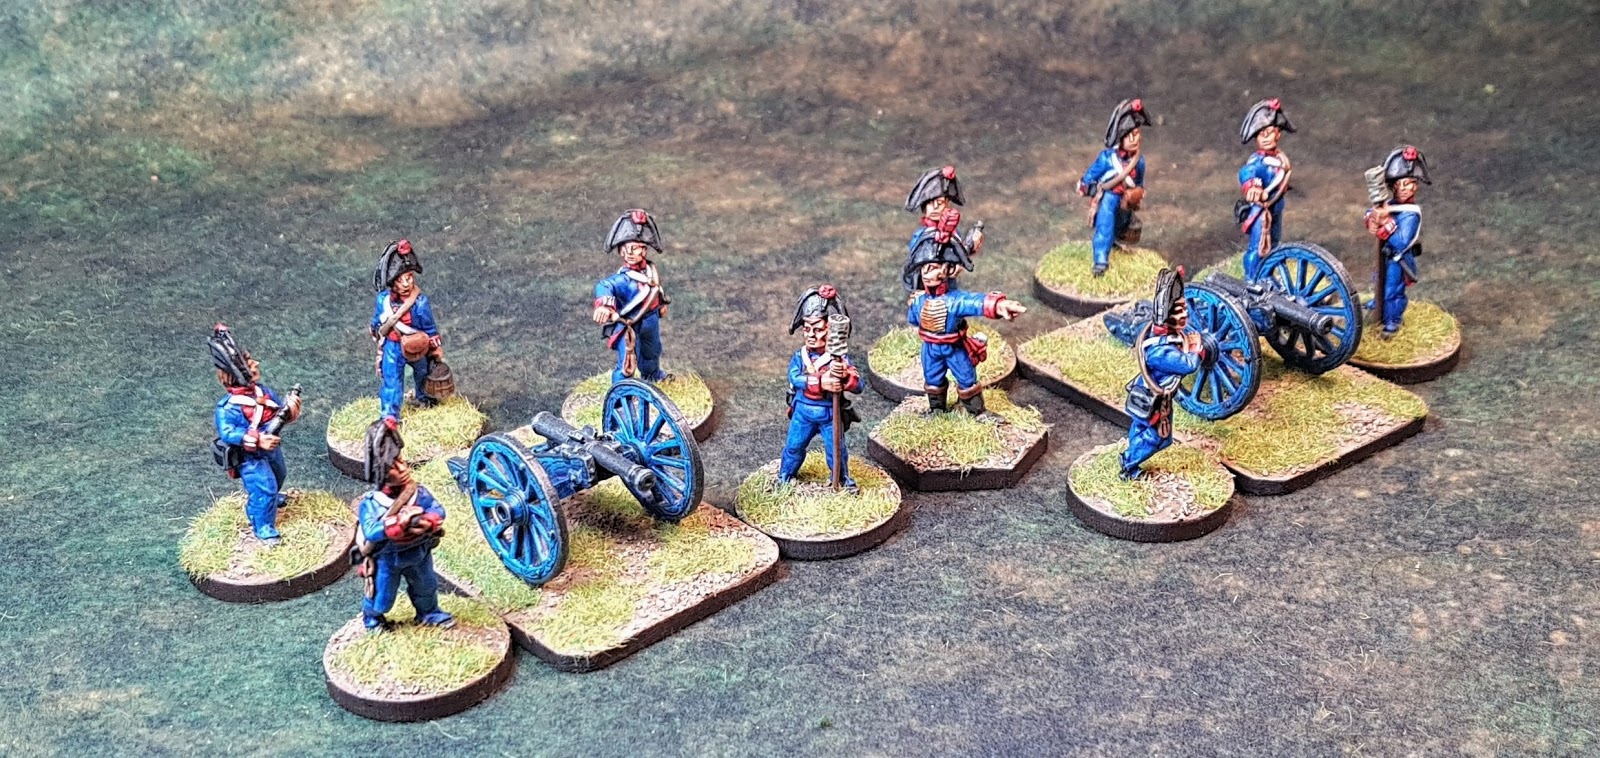
Last but not least, King's German Legion light infantry for Peninsular War gaming. These must have been an add-on to a Warlord Games order to get it over the free shipping threshold. Lovely figures but definitely a "one-off" for my British collection.


Saturday, September 5, 2020

Napoleonic French: additions

My current Napoleonic collection has been created for playing Sharp Practice 2 and all my armies are far past the point of fielding reasonable SP2 forces with good selections of optional units. Vidal and I had a hankering to try Napoleonic games at a higher command level (not that we haven't done so before... but that was years ago with vastly larger collections and in a club setting). We decided to play a couple of games of Black Powder with the French and British (combining my collections with Vidal's) for some entertaining outings. But recently, Field of Battle 3 was published and having played my fair share of FoB2 back in the day with the old (i.e. not current) Napoleonic collection, we thought we would give the new version a spin. Our first outing was with Vidal's ECW collection and we were pleasantly surprised to find a good memory of the rules and, perhaps more importantly, the enjoyment of FoB. Thus, I believe we will continue on the FoB3 path for the foreseeable future (and SP2, of course).

My new approach, should I decide to build other SP2 forces, is to continue with single-based figures with sabots for the basic forces and associated supports. Once a decent variation in units is achieved, any additions will be multi-based for FoB3 games in order to minimize setup and pack-away time. Thus, some additions to my Napoleonic French...


Young Guard
(Wargames Foundry miniatures, GMB flags)
The SP2 portion is made up of two groups of  eight figures each and two groups of six skirmishers each. The rearmost unit is multi-based to match the dimensions of the single-based sabots (or at least roughly so). The eagle-eyed viewer will notice both formations are only 15 figures each. A miscalculation was made and more figures must be ordered... eventually.

Legere
(Warlord Games miniatures, GMB flags)
I originally built six groups of eight figures each for SP2 (+ two groups of skirmishers). I found a few extra sprues of the plastic Warlord figs and decided a fourth battalion would cleanly round out a FoB3 brigade (seen at front left above). 

These additions give the French force two brigades of infantry (with accompanying artillery) and two brigades of cavalry. Vidal's collection adds another brigade of infantry (+ artillery) ... so we have the makings of a small French corps for FoB3:

1er Brigade
Legere Infanterie
Legere Infanterie
Legere Infanterie
Legere Infanterie
Legere Infanterie (sk)
Artillerie a Pied

2e Brigade
Ligne Infanterie
Ligne Infanterie
Ligne Infanterie
Ligne Infanterie (sk)
Artillerie a Pied

3e Brigade (Jeune Garde)
Tirailleurs
Voltigeurs
Tirailleurs (sk)

4e Brigade
Chasseurs a Cheval
Chasseurs a Cheval
Artillerie a Cheval

5e Brigade
Grenadiers a Cheval
Dragons de l'Emperatrice

Monday, May 4, 2020

SP2: French artillery

Looking for another quick win on my painting desk, I dug into the French Napoleonic pile and dug out six foot artillerists. This batch will give me two guns and crew for my French force in SP2 or one 2-gun battery for Black Power.

Foundry figures with a proxy American cannon (my French SP2 collection is in forced isolation in the Cambridge Gaming Emporium).

Tuesday, April 14, 2020

Exploring Officers & British Light Dragoons (dismounted)

I've been waiting impatiently for my Northstar order of FIW French to arrive (no knock on Northstar... just restless to keep the FIW project going) and so delved into the box o' shame and found some items collected at Fall In! 2019 from Brigade Games. For a while I've been wanting to put together some Moveable Deployment Points for our Sharp Practice Spanish Peninsula games. Brigade Games' exploring officers seemed to fit the bill perfectly.

For the British I decided to combine two irregularly uniformed officers on one stand. These should serve admirably for my British force.


And for the French, Pierre Ducos, intelligence officer. This figure is clearly an homage to the character in the Sharpe series.


While at the Brigade Games stand, I also picked up a pack of dismounted British light dragoons. These are lovely figures and a pleasure to paint. How much use they'll be in our games (or how often they'll be used) is a matter for conjecture. But that's never stopped me from adding such a unit to a collection.


Tuesday, April 7, 2020

on the road again...

Carrying on with my terrain-making for the War of 1812 and the French and Indian War, next up some roads. For many years I've been using a variety of materials for quick and easy roads, none of which were completely satisfactory. Part of the problem was finding a material that could be easily worked and looked good (and wouldn't warp when texturing or glue is applied). Of course, the other part was actually getting around to doing something about it...


A recent trip to Home Depot garnered several of these PVC(?) textured garage floor tiles. The texture is perfect!

For those interested, the product code. 

The tiles are easily cut with a heavy-duty exacto knife. The edges were then bevelled (a decidedly messy and tedious exercise). I also picked up some brown silicon caulking for the wheel ruts (be sure to get the paintable version). This is spread out with a finger and the wheel ruts scored in with a small wooden matchstick. Tip: wait a full 24 hrs for the caulking to cure completely before proceeding.

The caulking has been spread and the pieces ready for a variety of dry-brush coats and washes. You can see the original test pieces finished. The straight pieces (of various lengths) were easy to cut. The curves and junctions, not so much.

And the entire batch completed. A lot of work for what seems a small batch but all told it would stretch about 12 feet.


The rubber is flexible but only with some effort. These are not meant to be draped over hills or depressions but will conform to slight variations. If they're not stored flat, it takes only a few minutes for the rubber to settle flat when on a table.

And some action shots...


Saturday, March 21, 2020

War of 1812: Virginia Light Dragoons & militia artillery

Amongst the infantry additions over the last month or so for the Chesapeake campaign, I slipped in two units of American militia artillery. Since the state militia artillery uniforms of various states were, for practical gaming purposes, virtually identical, these could represent artillery from a number of states around the Chesapeake area, including Maryland, Virginia, and the District of Columbia. They are rather anachronistic in that they sport the bicorne, set aside earlier by the regular army in favour of shakoes. In a recent order to Wargames Foundry, I slipped in a couple of three pound cannon.

 Once again, I’ve gone with the venerable Old Glory figures. 

As a welcome Xmas gift, Captain Dan whipped up some American militia cavalry for my 1812 collection. Because many (if not all) militia units in the Chesapeake area sported anachronistic uniforms (aka more reminiscent of the American War of Ingratitude), we had to source the figures from the extensive Perry Brothers AWI line. While not a complete match to the requirements for Virginia cavalry, these British AWI cavalry are close. I had relatively little uniform info for this unit besides a couple of plates found online but this wasn’t a real deterrent. One of the advantages of creating a unit like this is that button-counters are usually silent.

Norfolk Light Dragoons
(Perry Miniatures)

Saturday, February 29, 2020

Chesapeake 1814: starting a new campaign

Good friend Vidal and I have ventured off into a new campaign, this time set during the British campaigns in the Chesapeake Bay in 1814. A general synopsis of the campaign and the rules can be found here: link 

I've been working on building up troops and terrain for this campaign over the last few months. In particular, state militia troops from Virginia and Maryland, and Royal Marines. I've also added a few new buildings to the collection, geared specifically to this campaign, here: link & link. So, after all this work, I thought it high time to start on the campaign. Our first game was a few weeks ago and I unfortunately failed to document it visually. Suffice to say that the American militia (commanded by me) was soundly beaten by the regular troops of Vidal's Crown forces.

After the first campaign turn (Scenario 3, Whiteman’s Tavern), The British gained one Victory Point and captured one sack of supplies.

Last evening, we gathered in the Cambridge Gaming Emporium to fight out the second turn of the campaign. This time up was Scenario 1, Freeing the Prisoners.

Scenario 1, Freeing the Prisoners
With the capture of so many American troops after the recent British raids, the British are moving them to the coast under guard in small, manageable groups. The local militia commander, Lieutenant Colonel Hugh Horry, has learnt that Captain Jonathan Roberts and a contingent of British troops are using a local plantation house and have the prisoners encamped in a field. He is resolved to free his comrades.

The table is flat with the plantation buildings at the Eastern end. The main house is two stories tall and provides hard cover for any troops inside. The other buildings are a single storey and provide light cover.

The PoW camp is made up of tents which do not impede movement or firing. They will simply be knocked down if moved over, the prisoners within fleeing and playing no part in the game. The fenced field to the South is overgrown and counts as Broken Ground. The trees to the North are orchards.

The rail fences provide light cover as will the wagons. The latter may be moved up to 1D6 inches in a turn by any Group of five men or more  spending that turn pushing them.

This game is won by the force which can break their opponent’s Force Morale.

Victory Points: American (2); British (1)


American Force

Advanced Guard
Lieutenant Colonel Hugh Horry, Status II
Captain John James, Status I
Three Groups of 8 Maryland Militia (M)

Captain Robert McCottry, Status I
One Group of 6 Militia Skirmishers (rifles)

Reserve
Colonel Frank Lee Speeckin, Status II
One Group of 8 Virginia Militia (C&V)

Captain John McCauley, Status I
One Group of 8 Virginia Militia (C&V)

The force deploys its Primary Deployment Point on the Western (left-hand) table edge. The Advanced Guard may use a Secondary Deployment Point which is placed according to the main rules. Only the Advanced Guard may use this and then only if the Skirmishers under Captain McCottry deploy to it before any other troops, representing them leading other units through the surrounding terrain.

The Reserve forces can only enter the table on the turn after all of the Advanced Guard are deployed. They must use the Primary Deployment Point on the Western table edge. All American troops have the Hearth & Home Bonus, reducing their Step Out rating by one.

British Force

Captain Jonathan Roberts, Status III
Two groups of 8 British regulars

Lieutenant Carlton Mellows, Status I
One Group of 6 British light infantry

Captain Rampton Rigsdale Status II
Two Groups of 8 Royal Marines

Your Primary Deployment Point is in the Sumter plantation house. At the start of the game all of your forces are inside the house with the exception of one sentry who may be placed anywhere on the table to raise the alarm if the enemy approach. None of your force may deploy onto the table until the alarm is raised. Groups may not deploy as formations and suffer 1d6 shock immediately when deployed.


A sentry is simply a one-man Group. He may be activated on any two Command Flags of the relevant colour, or on a single Command flag at the end of a turn. He may only activate when he has line of sight to an enemy unit which is deployed on the table. He may raise the alarm when activated by discharging his musket. He may then move and act as normal. If he is engaged by the enemy, by firing or fisticuffs, the noise will serve to alert friendly forces to the enemy’s presence.

Both sides begin with 9 Force Morale.

In the top left can be seen the American Secondary Deployment Point. My plan was to move the Advance Guard through the orchard, hoping to avoid the notice of the British sentry and appear on the far edge, ready to fire on any British troops deploying from the mansion.

The local plantation owner and his family have been disgorged from their home and are discussing the utter inhumanity of their home and property under the control of the hated British.

The sentry, apparently avoiding his duties, chats up one of the plantation girls.

Maryland militia deploy out of sight of the sentry and begin their move into the orchard. The Maryland rifles had preceded them to the far edge of the trees, apparently undetected by the distracted sentry.

The alarm has not yet been raised but the Maryland rifles open fire on the sentry. As he represents a one-man group, his death or rout would trigger a Bad Things Happen roll. Unfortunately, as with the first campaign game, my militia rifles were apparently well-dressed but ill-trained. The sentry survived without a scratch and thus the alarm was raised!

With the alarm raised, Vidal chose to deploy two groups of Royal Marines in the forecourt of the mansion to counter the Maryland move into the orchard.. One group manages the deployment with only one shock but the other is assessed six!

As well as the Royal Marines, two groups of British regulars deploy: one to the rear of the mansion (clearly set to fire the building) and one to the rear of the "workers' cottages."

I had chosen to this point to move my Maryland troops through the orchard in formation. Once closer to the British troops, I split the groups up. Why? It had become quite clear in the first game that militia troops without the Controlled Volley characteristic are difficult to control once volleys began. My plan here was to occupy some of the British with single-group firing and maneuver with the others. This proved to be a mistake as there was little room to maneuver while maintaining the needed cover of the orchard. Single groups at long range have little chance of inflicting any real damage (at least with my dice rolls....ugh) and as it turned out, the Maryland troops were fairly static once at the edge of the orchard. I could have easily left them in the formation and been able to spread hits and more easily activate them.

Maryland militia groups have split from their formation and are readying to fire on the deploying British troops from the cover of the orchard.

Maryland rifles begin to exchange fire with the British regulars hiding amongst the goods scattered around the "workers' cottages."

So now the stupid moment! This is something I know full well and chose to ignore for this battle (and truth be told, in the first campaign battle as well). Rifles are the perfect weapon to pester an enemy from long range. They are not .... repeat, NOT... so good at close ranges. They take two actions to reload, are vulnerable to formed troops, and are, quite simply, tempting targets. By deploying the Maryland rifles to the front of the orchard, I gave up their most valuable asset... long range. These guys can hit on 5s & 6s out to 36 inches. The other open flank of the battlefield would have been better-suited to their abilities, although this would have meant sacrificing surprise. The sentry would have easily seen them and raised the alarm earlier. As it turned out, this mattered little and I ended up squandering a valuable asset.


The foremost of the Maryland infantry groups has been forced back into the orchard. Meanwhile, the Leader with the rifles has been shot and killed (see above for self-deprecation). The only good news at this point is that one of the Royal Marine groups (the one with the six shock) has voluntarily withdrawn behind the "workers' cottages."

The Maryland troops at the front of the orchard take fire from the Royal Marines and slink back into the orchard. The only good news here from the American perspective is that the British regulars near the "workers' cottages" have been found to have damp squibs and fire now at half effect. This is almost wholly mitigated by the force commander (Level III) directing their fire. They've already killed the Maryland rifles commander and are causing shock, despite the heavy cover for the skirmishers.

British lights deploy from the mansion with only one shock.

Virginia troops begin to arrive from the Primary Deployment Point and move forward to help the beleaguered Marylanders.

The British regulars behind the mansion complete their task and the building has been set alight. That's one automatic VP for the Brits, regardless of the battle's outcome.

The Virginians continue their advance and begin exchanging fire with the British lights (who also seem to have damp squibs...the British quartermaster has obviously failed in his duties). Unfortunately, the Virginian effort proves too little too late...

Vidal had recovered his second Royal Marines group and formed them up with their brethren and the regulars to begin an advance into the orchard. While militia can sometimes stand up to regulars in a firefight (at least for a short while), it's another thing entirely in Fisticuffs (especially when one group of Marylanders is caught unloaded). The sweep through the orchard is swift and deadly. The American Force Morale drops quickly to 2 and we called it a (very obvious) British victory. Side note: The Maryland rifles evaded the charge of the British regulars... but further proving my Dumb Ass point above.


Vidal gains two Victory Points from the battle: one for winning the scenario and one for burning a major building. This brings us to an Aggregate VP total of 3 in the British favour. Small mercies, however... the burning of the building brings some small recognition of the crisis to the federal and state governments and one 8-man militia unit and Status I Leader will now be added to the American force for every subsequent scenario. The more they burn and loot... the more reinforcements arrive. Of course, more militia is a double-edged sword!

Militia is going to be a challenge to learn how to control. They have inferior characteristics to the British and for most scenarios, I will have fewer overall Command Initiatives spread around my leaders. There is  an argument not to create formations because they are difficult to control after firing begins. Although, if in a defensive posture, this would not be such an issue. Splitting militia groups up could be an answer but the generally inferior command structure of the Americans can make this difficult as well. One thing I need to drum into my head is the proper use of rifle-armed skirmishers: use their long range and stay away from the temptation to get closer to the enemy.